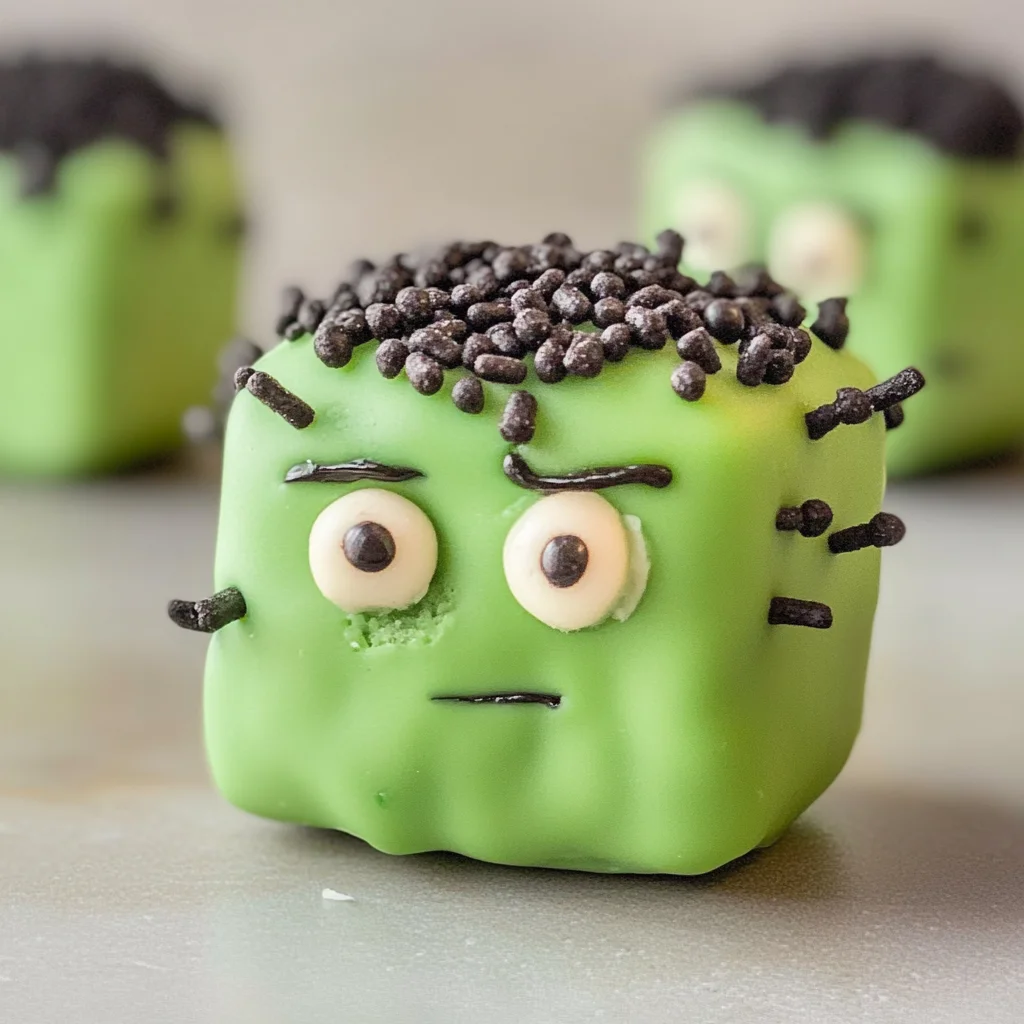
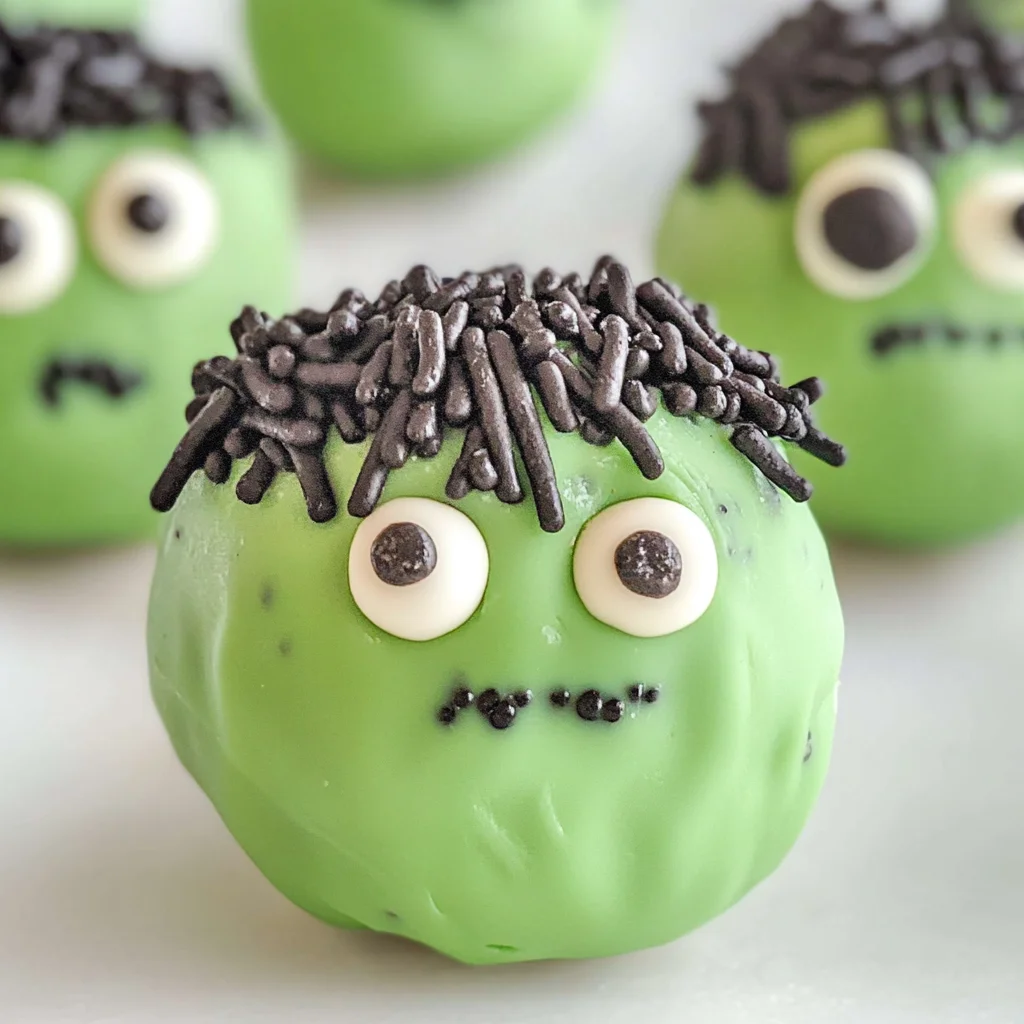
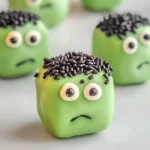
Frankenstein Oreo Balls
If you’re looking for a fun and delicious treat to brighten up your Halloween gatherings, look no further than these Frankenstein Oreo Balls! These delightful little monsters are not only super easy to make but also bring a charming flair that everyone loves. With their creamy center, sweet green coating, and adorable decorations, they’re bound to become a favorite at any party or family get-together.
I love making these with my kids; it’s such a fun way to get everyone involved in the kitchen. Plus, they make for a perfect dessert after a busy week or a spooky movie night. Trust me, once you try these Frankenstein Oreo Balls, you’ll want to make them every Halloween!
Why You’ll Love This Recipe
- No Baking Required: These treats come together without the fuss of an oven, making them perfect for last-minute celebrations.
- Kid-Friendly Fun: Get the whole family involved! Kids will love shaping the balls and decorating them.
- Make-Ahead Treats: You can prepare these the day before your event, so you’re free to enjoy time with family and friends.
- Endless Creativity: Customize your decorations! Change colors or add different toppings to create your unique monster designs.
Ingredients You’ll Need
Let’s gather some simple and wholesome ingredients that you probably already have in your pantry. These are easy-to-find items that come together beautifully in this recipe!
For the Oreo Mixture
- 36 Oreos (finely crushed)
- 8 oz cream cheese (softened at room temperature)
- 1 teaspoon vanilla extract
For the Coating and Decorations
- 2 cups light green melting wafers
- ½ cup black or dark chocolate melting wafers
- 1-½ tablespoons crisco shortening
- Black sprinkles (long not round)
- Pretzel sticks
- Small candy eyes
Variations
This recipe is wonderfully flexible! Feel free to switch things up and add your personal touch with these fun variations:
- Try different flavors: Use mint or peanut butter Oreos for a unique twist on flavor.
- Colorful coatings: Swap out the light green melting wafers for orange or purple ones for Halloween vibes!
- Add some crunch: Mix in some crushed candy corn or nuts into the Oreo mixture for added texture.
- Get creative with toppings: Instead of pretzel sticks, use candy corn for spikes or gummy worms for a spooky touch!
How to Make Frankenstein Oreo Balls
Step 1: Combine Your Ingredients
In a large mixing bowl, combine the finely crushed Oreos, softened cream cheese, and vanilla extract. Using an electric hand mixer or stand mixer, mix everything together for about 1-2 minutes until it turns into a smooth dough-like mixture. This step is crucial—mixing it well helps create that delightful creamy center.
Step 2: Shape Your Monsters
Using a 2-tablespoon cookie scoop, take portions of the dough and roll them into even balls using your palms. Place each ball on a large cookie sheet lined with parchment paper. Gently press down on each ball to create flat tops. Flip each ball over and flatten all sides until they resemble little squares. This gives our Frankenstein creations their iconic shape!
Step 3: Chill Out!
Now it’s time to let those beauties chill! Pop the cookie sheet into the refrigerator and let them sit for about 2 hours. Chilling is essential as it firms up the mixture and makes dipping easier later on.
Step 4: Melt Your Green Coating
While waiting for our treats to chill, let’s prepare the light green melting wafers. Put them in a microwave-safe bowl and heat at 50% power for one minute. Stir with a fork; if needed, return to the microwave in additional 30-second bursts until smooth. Adding crisco helps achieve that silky finish that’s perfect for dipping.
Step 5: Coat Your Frankenstein Balls
Using two forks (or dipping tools), dip each chilled Oreo square into the melted green chocolate until fully coated. Allow any excess chocolate to drip off by scraping it against the edge of the bowl or gently swaying side to side.
Step 6: Decorate Your Monsters
Immediately after coating one side with green chocolate, dip it into black sprinkles—this creates Frankenstein’s signature hair! Add small candy eyes on top while everything is still wet. Lastly, break pretzel sticks into approximately one-inch lengths and press them into each side of your monster’s head as bolts.
Step 7: Pipe Some Personality
Melt the remaining black melting wafers using crisco just like before. Pour this melted chocolate into a small sandwich-size Ziploc bag and cut off a tiny corner of one end. Now you can pipe smiles or frowns onto each monster head—let your creativity shine here!
Step 8: Final Chill
Once decorated, place your Frankenstein Oreo Balls back in the fridge for another 30 minutes before serving. This final chill helps everything set perfectly so you can enjoy these spooky delights at their best!
Now that you’re all set with this fun recipe, gather your ingredients and start creating your own batch of adorable Frankenstein Oreo Balls! Happy Halloween baking!
Pro Tips for Making Frankenstein Oreo Balls
These adorable Halloween treats are sure to impress your friends and family, but a few tips can help you achieve the best results!
- Use softened cream cheese: Starting with cream cheese at room temperature makes it easier to mix with the crushed Oreos, ensuring a smooth and consistent dough.
- Chill before dipping: Make sure to chill your formed balls for at least 2 hours. This helps them hold their shape when you dip them in chocolate, resulting in a neater presentation.
- Don’t rush melting the wafers: Melting chocolate slowly (using 50% power) helps prevent burning and ensures you get that silky-smooth consistency. Stirring frequently is key to achieving the perfect texture.
- Experiment with decorations: Get creative! You can use various sprinkles or edible glitter for different effects—let your imagination run wild and make each Frankenstein ball unique!
- Store properly: Keep any leftovers in an airtight container in the fridge for up to a week. They taste great cold, making them a perfect treat to snack on later!
How to Serve Frankenstein Oreo Balls
Presenting your Frankenstein Oreo Balls beautifully can elevate your Halloween festivities! Here are some fun ideas on how to serve them.
Garnishes
- Green Candy Sprinkles: Adding these around the base of the Oreo balls gives a festive touch that complements their color.
- Chocolate Drizzle: A light drizzle of melted dark chocolate over each ball can add an elegant touch and enhance their flavor.
- Spooky Edible Eyes: Scatter some extra candy eyes on the serving platter for added whimsy and fun!
Side Dishes
- Ghostly Fruit Salad: Combine spooky fruits like bananas, grapes, and apples for a light side dish that balances out the sweetness of the Oreo balls.
- Pumpkin Spice Popcorn: Season popcorn with pumpkin spice seasoning for a crunchy, fall-inspired snack that pairs perfectly with dessert.
- Witch’s Brew Smoothie: A bright green smoothie made from spinach, banana, and almond milk adds nutrition while fitting right into your Halloween theme.
- Monster Veggie Platter: Create a colorful assortment of veggies served with hummus or ranch dressing. It’s a healthy option that will be appreciated by guests of all ages.
Now that you have all the details covered, get ready to impress everyone with your delightful Frankenstein Oreo Balls this Halloween! Happy baking!
Make Ahead and Storage
Frankenstein Oreo Balls are a fantastic option for meal prep, making them perfect to whip up ahead of time for parties or family gatherings. You can easily store or freeze these treats, ensuring you have a spooky dessert on hand whenever you need it!
Storing Leftovers
- Store any leftover Frankenstein Oreo Balls in an airtight container.
- Keep them refrigerated for up to 5 days.
- Avoid stacking the balls directly on top of each other to prevent them from sticking.
Freezing
- To freeze, place the Oreo balls in a single layer on a cookie sheet and freeze until solid (about 1-2 hours).
- Once frozen, transfer them to an airtight freezer-safe container or Ziploc bag.
- They can be frozen for up to 3 months. Just remember to thaw them in the fridge before serving!
Reheating
- These treats are best enjoyed cold or at room temperature. Simply take them out of the refrigerator and let sit for about 10-15 minutes before serving.
- Avoid reheating in the microwave or oven, as this may affect their texture and appearance.
FAQs
If you’re curious about how to make these delightful treats even better, check out these frequently asked questions!
Can I use different colors of melting wafers for my Frankenstein Oreo Balls?
Absolutely! While light green is classic for Frankenstein, feel free to get creative with colors that suit your Halloween theme or personal taste.
How do I make sure my Frankenstein Oreo Balls look perfect?
To ensure your Frankenstein Oreo Balls turn out great, chill them well before dipping and use proper dipping techniques. The smoother your coating, the more appealing they will look!
Can I make these Frankenstein Oreo Balls vegan?
Yes! You can substitute regular cream cheese with vegan cream cheese and ensure you select plant-based melting wafers.
How long do Frankenstein Oreo Balls last?
When stored properly in the refrigerator, they will last for about 5 days. They also freeze well, extending their life up to 3 months!
What’s special about Frankenstein Oreo Balls?
Frankenstein Oreo Balls are not only fun and festive but also easy to make! They bring joy to any Halloween celebration with their delightful flavor and unique appearance.
Final Thoughts
I hope you find joy in creating these whimsical Frankenstein Oreo Balls! They’re not only a treat for the taste buds but also a feast for the eyes. Whether you’re hosting a Halloween bash or just looking to add some fun into your dessert lineup, these little monsters are sure to impress. Enjoy making them and watching everyone’s faces light up with delight!
Frankenstein Oreo Balls
Get ready to delight your guests this Halloween with fun and festive Frankenstein Oreo Balls! This easy no-bake dessert features a creamy Oreo center coated in vibrant green chocolate, complete with charming decorations that make them a hit at any gathering. Perfect for kids and adults alike, these monster treats are not only simple to whip up but also offer endless opportunities for creativity. Customize the flavors, colors, and toppings to make these spooky snacks uniquely yours. Whether you’re hosting a Halloween party or enjoying a cozy movie night, these adorable bites are sure to leave everyone smiling!
- Prep Time: 30 minutes
- Cook Time: 0 minutes
- Total Time: 30 minutes
- Yield: Approximately 18 servings 1x
- Category: Dessert
- Method: No-bake
- Cuisine: American
Ingredients
- 36 Oreos (finely crushed)
- 8 oz cream cheese (softened)
- 1 teaspoon vanilla extract
- 2 cups light green melting wafers
- ½ cup dark chocolate melting wafers
- black sprinkles
- pretzel sticks
- small candy eyes
Instructions
- In a large mixing bowl, combine crushed Oreos, softened cream cheese, and vanilla extract. Mix until smooth.
- Roll the mixture into balls using a cookie scoop and place on a parchment-lined cookie sheet. Flatten each ball to resemble squares.
- Chill in the refrigerator for about 2 hours.
- Melt light green wafers in the microwave and dip each cooled square until fully coated.
- Immediately sprinkle black sprinkles on top for hair and add candy eyes.
- Use melted dark chocolate to pipe faces on the monsters.
- Chill again for 30 minutes before serving.
Nutrition
- Serving Size: 1 serving
- Calories: 170
- Sugar: 12g
- Sodium: 70mg
- Fat: 9g
- Saturated Fat: 5g
- Unsaturated Fat: 3g
- Trans Fat: 0g
- Carbohydrates: 20g
- Fiber: 1g
- Protein: 2g
- Cholesterol: 15mg